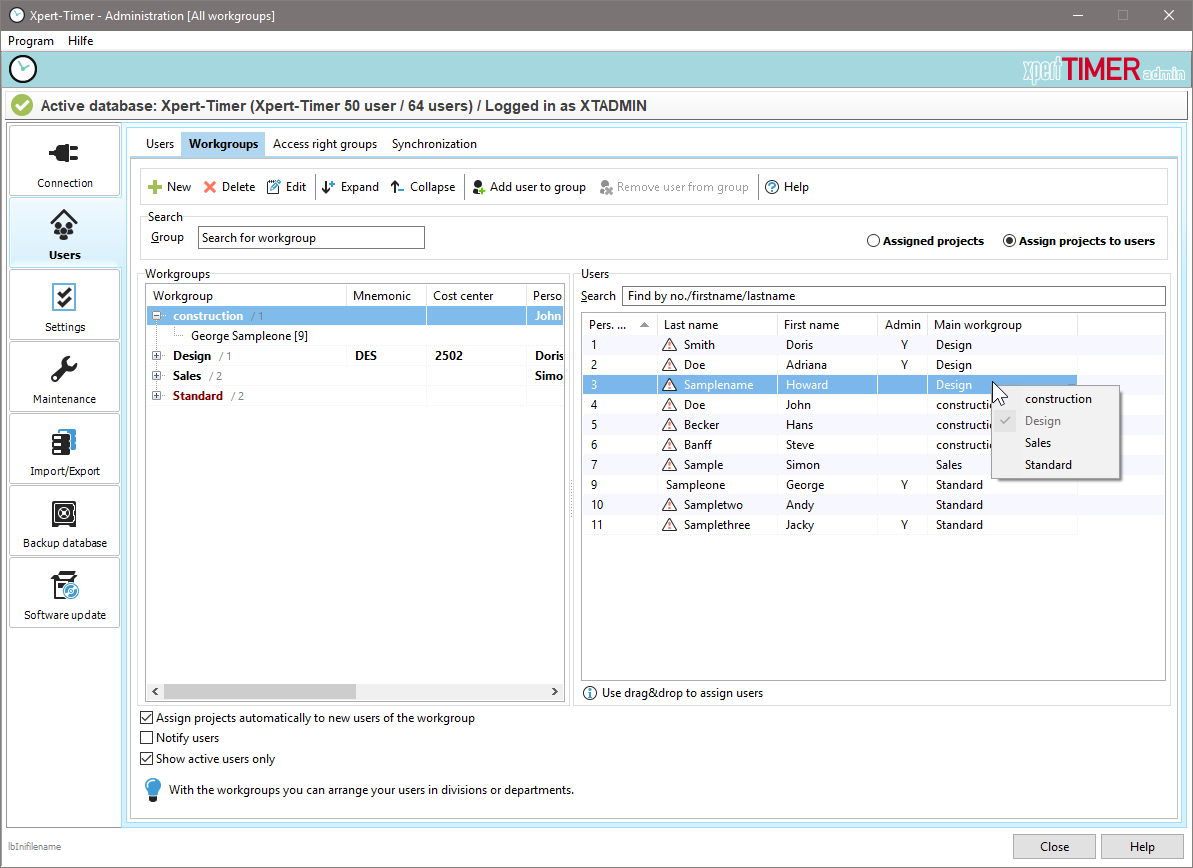
Here is a description of how to change an existing database to work group mode "Cross-work group".
First important step: Database command on MS-SQL
update projects set created_work group_nr = '11111111-1111-1111-1111-111111111111' where created_work group_nr is NULL
Open the XTAdmin and log in to your database as user "XTADMIN". Only the user XTADMIN has all functions of the program available.
Switch to the "Settings" tab and select the work group mode "Cross-work group".

In the "User manager" point to the tab "Workgroups", create the appropriate employee groups and assign the employees to the created workgroups using drag & drop.

Now right-click on a column heading to bring up the column "Main work group". Make sure that every employee belongs to a main working group. By right-clicking in the "Main work group" column, you can assign a main work group to the employee.
If the employee creates new projects or customers, these are first created in the main work group and can then be assigned to another work group.

The next step is the assignment of customers / projects to the working groups:

Finally, you will adjust the rights groups in the next step. Turning on Workgroup Mode adds the following new rights:
Task Area:
- See all tasks of the working group
- see all tasks of the project staff (if responsible person)
Documents Area:
- See all documents of the working group
- See all documents of the project staff (if responsible person)
Reminders Area:
- See all the memories of the work group
- See all reminders of project staff (if responsible)
Billing Area:
- See all offers of the working group
- See all bills of the working group
Activity Report Area :
- See all entries of the work group
- see all entries of the project members (if responsible person)
Client Area:
- See all customers of the work group
- See all clients of responsible projects
Employee Management Area:
- See all employees of the working group
- Assign employees to workgroups
- See all employees of own projects (if responsible person)
Notes Area:
- See all notes of the working group
- see all tasks of the project staff (if responsible person)
Project Area:
- see projects of other employees of a working group
- Assign projects to workgroups
- See all projects with project responsibility
Reimbursables Area:
- See all the services of the working group
- See all the services of the project staff (if responsible person)
Timestamps Area:
- See all times of the work group
- See all times of the project staff (If in charge
In the next step, the project assignments of the employees should then be checked.
Then put the responsible employees in the project properties. Thus, the conversion to workgroups is finished.