Welcome to our short tutorial, that will guide you through most of the features of Xpert-Timer. The tour shows the most important steps from creating a project to billing in Xpert-Timer:
 When you create a new project, fill in the main project name and if you want a project number. If you plan on using automatically incrementing project numbers, the project number must be numeric. You cannot use any letters in the project number. To assign a project to a client, right click on the newly created project and choose "Assign to client". 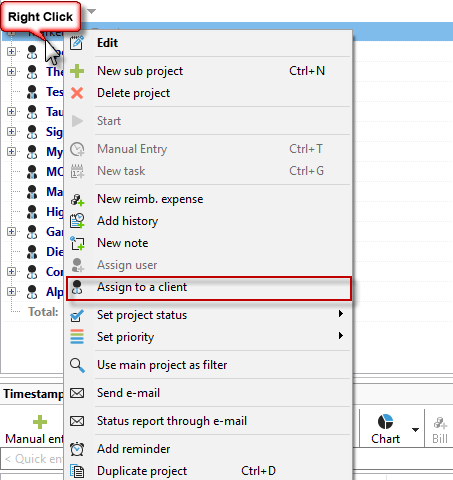 Project settingsFirst of all you need to create a main project. If you need multiple sub projects, just mark your main project with the mouse in your project manager and hit "Create new project" again. Xpert-Timer automatically detects, that you now want to enter a sub project. 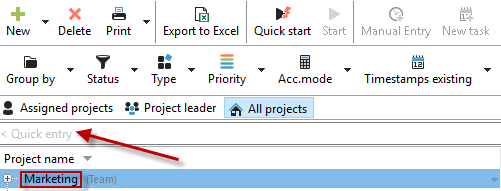 You can also use the "Quick Entry" to enter your projects. If you don't check the box "Create main project", Xpert-Timer will create a sub project for the marked project in the list. In above example, we'd create a sub project for "Marketing". In order to create a new main project, make sure you check the box.
You can write any text into the description field of the project. Double click the project to open the project settings. This description is displayed when you run the mouse over the project name in your project manager. 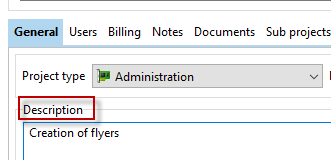 Xpert-Timer includes the option to automatically ask for a timestamp comment or history entry when you start or stop a project. You can find this setting in the Project properties -> General.
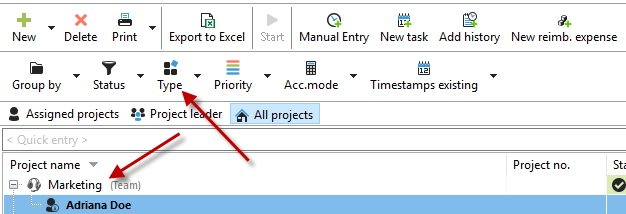
 Select a project type in the project properties. You can also create project types yourself. Project types serve as a filter criterion. For example, you can display all projects with the project type "Consulting" in a certain date range. 
If you have used those project types when creating a new project, you'll see the symbol of the project type besides the project name in your project list. You can then use the filter on project types to filter the projects and times for this certain project.
The next step for a good project management is to estimate the duration of your project. You can also add a date for the start of your project and a planned completion date. This helps to keep track of your running projects and lets you evaluate your estimation later on. 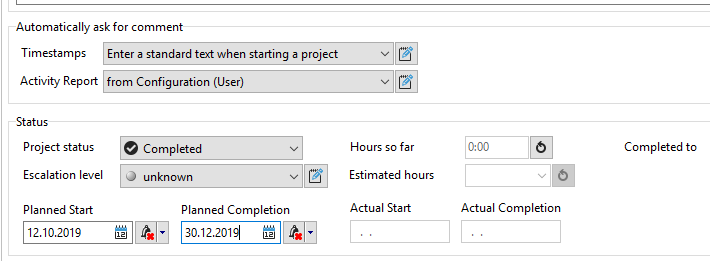 Except for the project name, all project details are optional. If you want to start the program quickly, enter a project name and click "Save". BillingChoose between three options: 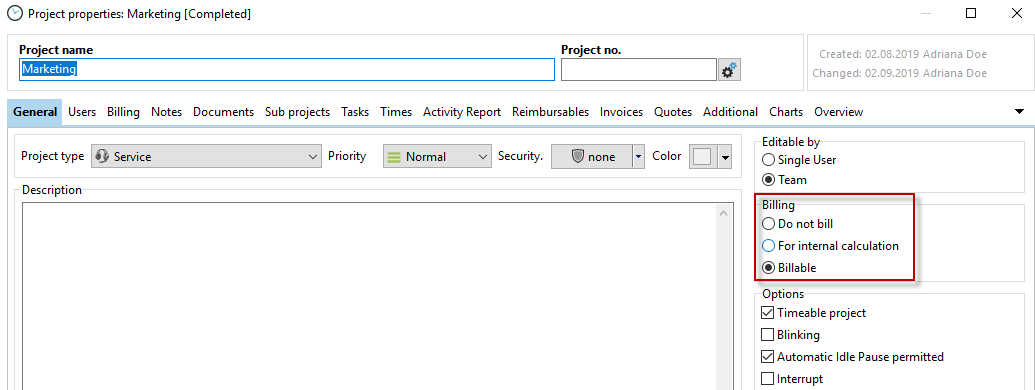
Do not bill: This project can not be billed to a client and is not included in the daily working time. For example: Private phone calls or lunch break. For internal calculation: This project is not calculated into the price for the client to be billed (Price is 0.00), but is still calculated (time) for internal reasons. This could be for example a support project of a client with a support contract. The client does not get billed for the support time, but the manager still wants to know how much time was spent for the support. Billable: This project is calculated in your total working hours, and the internal as well as the external price for the client is calculated in the timestamp list. This is usually the standard setting for your projects, even if you never bill a client.
In the tab "Billing" you can enter the project specific billing rates. These can either be pulled from the main project, the rate you entered in the user settings, from the price list or have its' own billing rate. In our example, the project has its' individual billing rate at 95 Euro per 60 minutes. In your timestamp list you can find the price, internal price and the price per Unit again. Save your settings and you can start timing the project. 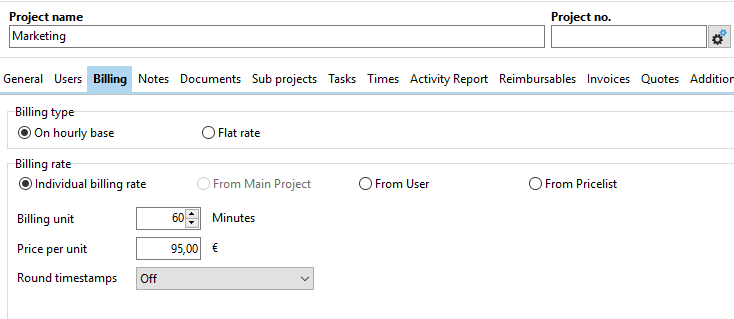 
|
Now the time on the time bar starts running as well. You can always see the current running project on the time bar. Depending on the configuration of the time bar, you see the buttons, your name, the project name, the duration, countdown, charges,running time of the project and your current daily working hours. In our case the Example project has been running for 20 minutes. Please note, there's no seconds in Xpert-Timer.  Right click on the time to switch through different sums. For example: Total daily sum, project sum... If you don't want the time bar blocking other windows on your desktop, hold down the Ctrl key and run the mouse over the time bar. It will jump out of the way. In order to activate this function you need to check the option "Hide time bar when Ctrl + mouse cursor contact" in the configuration. If you double click on the project name, the project settings will open. You can configure this behavior also in the configuration. |
Optionally, you can view your timestamp in the project manager. These will appear in a list, either horizontally or vertically in your project manager.  The narrow green line on the left side of the timestamp appears, when all listed timestamps are in order, meaning they have no gaps. If there are any gaps in the time stamps no line will appear and if the times are overlapping, the marker is red. 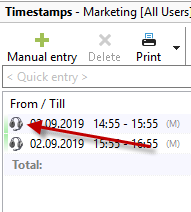 If you right click a timestamp, you get following menu: 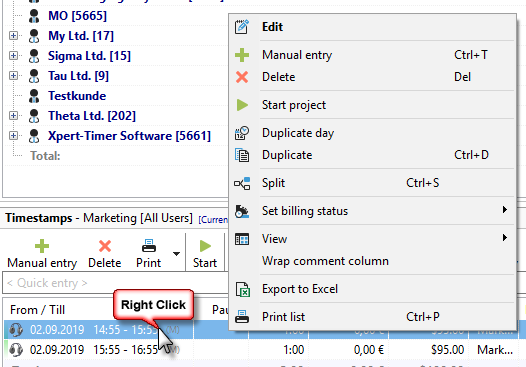 You can manually edit your timestamp here. If you want to merge or split your timestamps, you can do this, too. Please note that you can only merge timestamps of the same project. If you split a timestamp, you'll be asked when to split it. If you need further information on this function, point to the chapter Time stamps If you want to keep track of your billed timestamps, you can set the billing status for certain timestamps to "Billed". Print timestampsYou can print your timestamps any time the way they are filtered in the project manager. Group them or filter them by using the menu buttons and show/hide columns by right clicking on the column header. 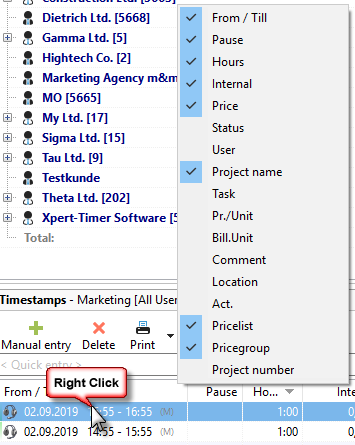 Use the "Save view" button to save all your filter settings. Use the button later again, to chose from saved settings.  |
To track the progress of your project, we recommend adding comments to your timestamps. By default, these are displayed under your project list in the Project Manager. In the View menu, you can also display the time stamps to the right of your projects. In the project properties (double-click on the respective project), you can specify that you are automatically prompted for the timestamp comment as soon as you start another project, or stop a project. If you want to keep other employees up to date on the status of the project, you have the opportunity to inform them by e-mail about the project progress. The dispatch takes place over the button "Send E-Mail Report" on the time bar.  If you click in the comment field of the time stamp, you can edit it with F2. With Ctrl + C you can copy comments and then paste them by Ctrl + V into several other marked timestamps. By right-clicking on the comment field, you can also include a free text or an existing text module.  You can print your timestamps any time the way they are filtered in the project manager. Group them or filter them by using the menu buttons and show/hide columns by right clicking on the column header.  |
To follow the development of your project, you can either use timestamp comments or the activity report. Double click on a project and choose "Activity report" in order to add an entry. The activity report is not based on timestamps. So it only makes sense to use it, if your entries don't need to be documented together with the timestamp. If you need to know exactly what you did at what specific time, you need to work with the comments on timestamps.
You can decide, if you want the application to ask automatically you for an activity report entry as soon as you start timing another project or shutdown Xpert-Timer. You can change the setting in the configuration.  If you want to keep other employees up to date on the status of the project, you have the opportunity to inform them by e-mail about the project progress. The settings can be found in the project properties in the tab "Further". Of course you can print the activity report.  |
![]() Add a new task in your To-Do list
Add a new task in your To-Do list
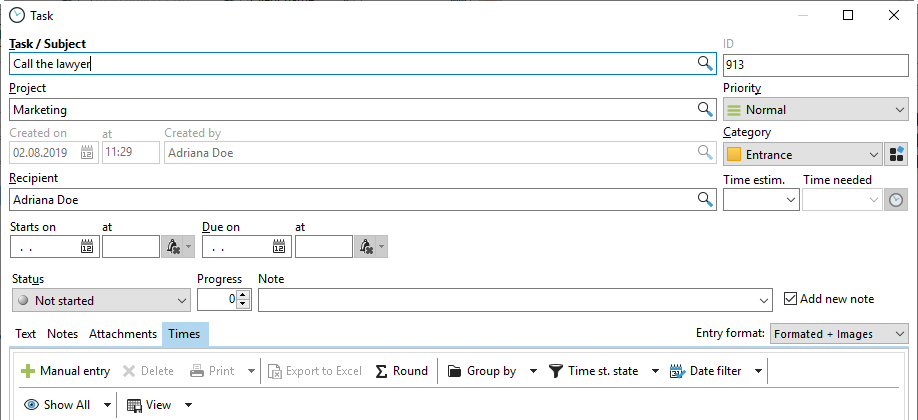
First assign a name to your task. This subject will also be displayed in your To-Do list. The ID number is assigned automatically and can be used for reference, e.g. in meetings. The ID number cannot be changed. It's necessary to link the task to a certain project.
The priority of tasks range from "Low" to "Immediately". For priority "Immediately" the fields "Due Date" and "Starts at" are irrelevant, because the task needs to be worked on immediately.
Enter the person who is supposed to fulfill the task. You can also enter part of the name and press "Enter" on your keyboard. Xpert-Timer then selects the appropriate employees. In order to keep track of all your tasks and sort them, you can use categories. Those categories can be renamed in the configuration dialog of Xpert-Timer. You can then filter your tasks by category in your To-Do list.
A due date is necessary if you need a certain task to be finished at a certain date. You can also estimate the duration of the task for your reference. If you need to print the duration, right-click on a column header and show the duration column. Last but not least you can enter a description of the task. You can use text phrases by right-clicking into the text field. Multiple other functions are available in the context menu. E.g. entering the user name, date, time and may more 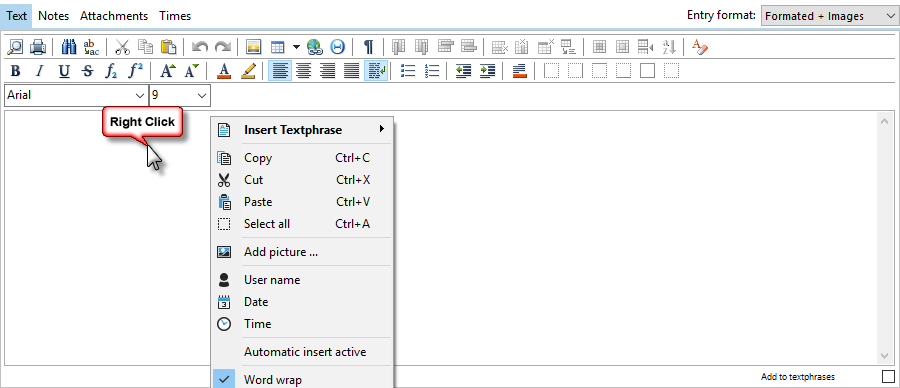
To automatically set a task to the status "To be edited", select "Start task". The subject of the task is also written automatically in the timestamp and the time of the task is started. 
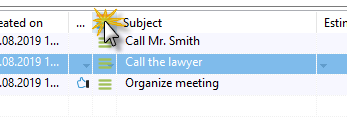
You can also drag and drop your tasks at any time in the task list. Just take a task with the mouse and drag it into another category or project.  Completed tasks can be reopened later. To do this, select the appropriate task; right-click to open the context menu. Then click on "edit" and use the button "reopen". 
Visit the chapter "To-Do list" in order to find out more functions. |

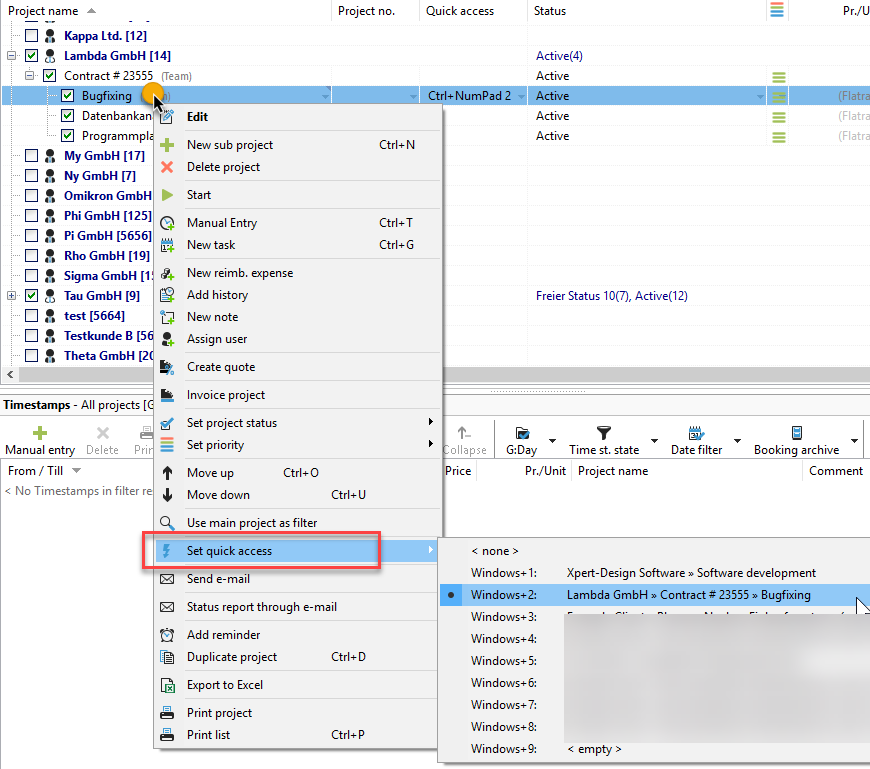
 you can select the desired key combination for creating the keyboard shortcuts under the "Keyboard shortcuts" tab. Without using the mouse, you can now switch between your projects.
