In this chapter you will learn how to create a new task. You can also edit an existing task again.
Further information can be found under these chapters:
There are several ways to create new tasks in the Project Manager. The fastest method is intelligent quick entry in your task window.
.
The quick entry interprets your entries. For example Xpert-Timer automatically sets the date for you to enter "Meeting with Mr. Smith". You could also name a day of the week, e.g. "This Wednesday 8:00 clock meet with Mr. Maier". Xpert-Timer automatically adopts the date and time correctly in the date format. The days of the week are cut out in the task text.
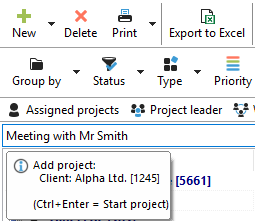
becomes:

|
Quick entry |
|---|---|
Note that the project that is currently highlighted in blue in the project manager, is always taken as the basis for creating the task. In the example below, the focus is currently on the project "Meeting with Mr. Smith". |
|
With the quick entry, the task refers to the project selected in the Project Manager. The recipient is also the employee who has been selected in the project manager. As soon as you place the cursor in the area of quick entry, an info dialog opens that tells you exactly which project reference and user reference will be created.
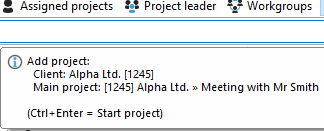
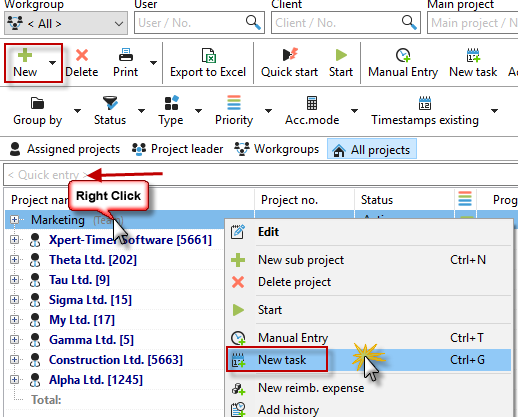
Xpert-Timer always tries to understand for which project and employee you want to create the project. In our sample screenshot, we would create a task related to the "Manual XT Pro" project by right-clicking on the blue-highlighted project "Manual XT Pro" in the Project Manager and choosing "New Task".
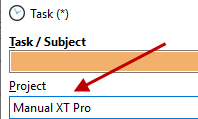
On the right in the task window, you would create a task for the project "Marketing" by right-clicking and clicking on the green plus, because this was marked with the mouse.
|
Intelligent quick entry |
|---|---|
Be sure to read the "intelligent Quick entry" chapter on other areas in your Xpert-Timer. |
|
Dialog: Task
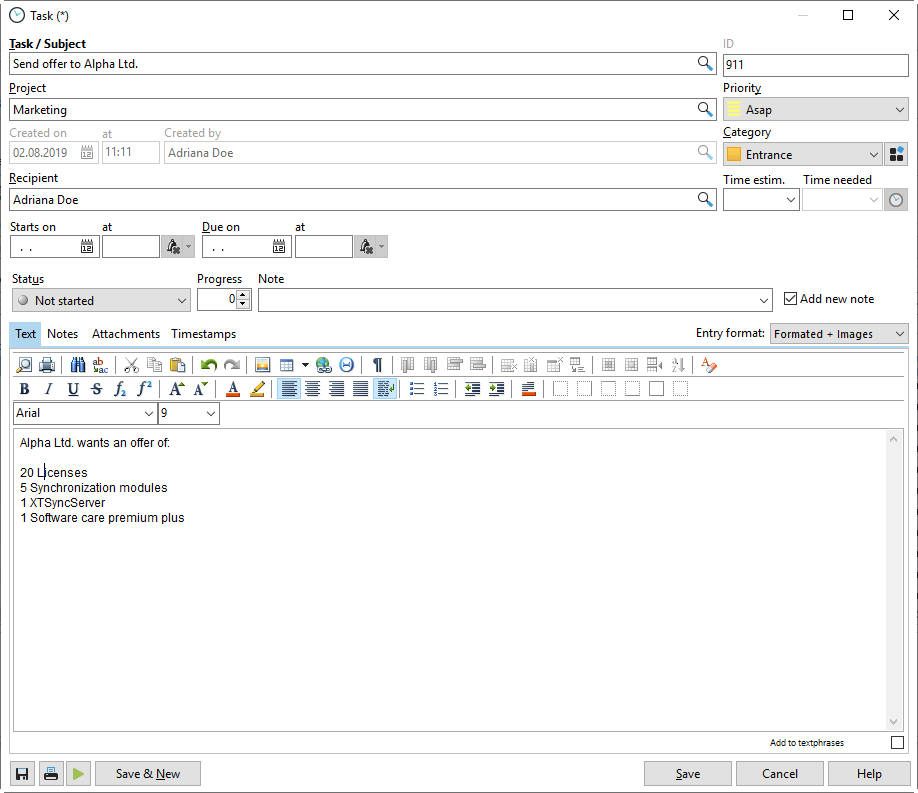
To create a new task, first assign a task subject. This "subject" is also displayed in your task list. The ID for the task is assigned automatically. It is used in a meeting to easily reference a specific task. You can not change this ID number.
You can also create a task without employee reference. Your task ends up in the joint task pool of the employees. These can then assign a task by right-clicking if they have time to edit it.
The priority of the tasks ranges from lowest to immediate. For the priority "Immediate", the fields "due on" and "starting from" are irrelevant, since the task is due immediately.
In the task list, you can also sort your tasks by priority by clicking on the column header. This sorting works with every column.

As the recipient, enter the person who should process the task. You can also type part of the name and press "Enter" on your keyboard. Xpert-Timer then selects the appropriate employee.
You can use the task status to specify in which work step the task is currently. The following statuses are available:
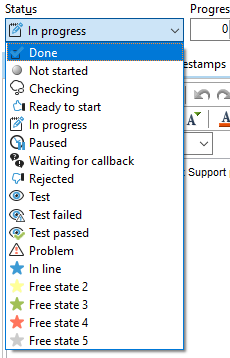
You can edit and freely name the "free states" in the configuration of the Xpert-Timer.
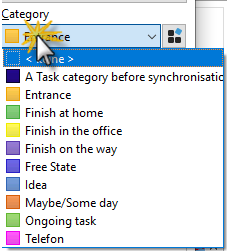
To better sort your tasks, you can divide them into categories. You can define these categories yourself in the configuration of the Xpert-Timer. In the task list, you can then filter your tasks by these categories. Next to the drop down box you have the possibility to edit the categories. There you can also define a standard category.
If you would like to see the tasks in your task list at a specific time, enter a date in the field "Begins". Only when this date is reached, the corresponding task is displayed in the task list.
A due date is needed if the task should be completed by a certain time. If this time is exceeded, the task will be displayed in red ink.
Optionally, you can estimate the duration of the task. Since all tasks are tied to a project, you can also include this estimate in your project.

If necessary, you can display and print the ''Time estimated'' column in your task list.

Finally, give a detailed description of your task. You can also use text phrases which you can also specify in the configuration. Right-clicking in the text area gives you more options, e.g. to insert the user name, date or time.
If you have the column "Creator" displayed, your own name appears in gray, because this is rather "unimportant". The names of other creators who have created a task for you appear in normal font.

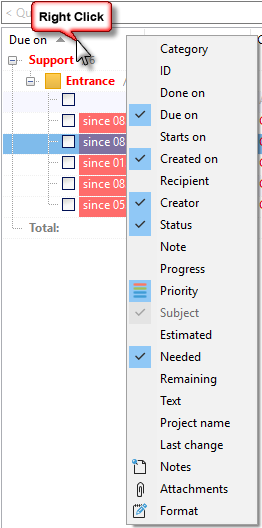
You can show or hide columns by right-clicking on a column heading in your task list. As with the entire Xpert-Timer, all columns that you display are printed. If you don't want them printed, hide them.
