Under the "Users" tab, you can make further assignments for the new employee in the "Additional" area.

E-mail / default recipient for e-mail reports
If you use the e-mail functions in Xpert-Timer, please enter your e-mail address here. The Xpert-Timer allows you to send reports or info emails at the push of a button. It's even faster if you always send your report to the same recipient. Click e.g. right-click on a project and select "Status Report by Email". The default recipient is already in your e-mail dialog.
security_level
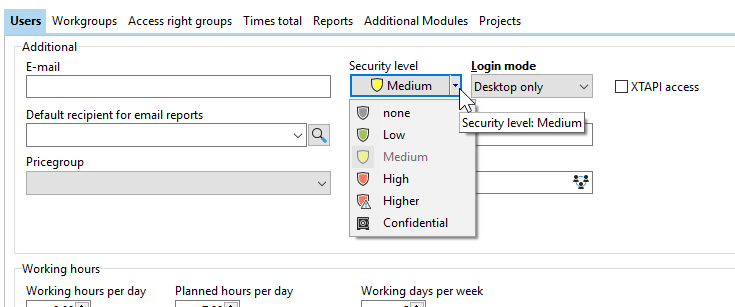
You can assign a security level to an employee. These security levels control the visibility of objects in the Xpert-Timer. They access customers, projects and documents.
|
Example |
|---|---|
An employee with the security level "Confidential.", sees all objects created in the system. An employee, e.g. has the security level "high", sees all objects with the security levels "high", "medium", "low" and "none". All "Very high" and "Confidential." classified objects are not visible to this employee. |
|
login mode
The Xpert-Timer has three different login modes:
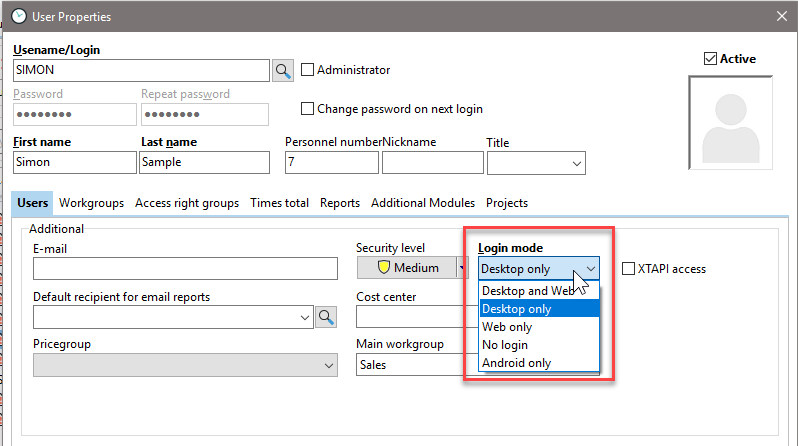
Desktop & and Web |
This user can log into Xpert-Timer Pro and the Xpert-Timer Web Interface, if XTCloudserver is in your license. |
Desktop only |
This user can log into Xpert-Timer Pro for windows. |
Web only |
This user can only use the browser and XTWeb to log into the system. |
No login |
This user is created for administration purposes only. For example, external users who work on the project but do not log on to the system themselves are recorded under this user. |
Android only |
Only Android users use their mobile device for time recording and send the data to the central server. Also, you will never log on to the Xpert-Timer Pro System on Windows. |
XTAPI access
Check this box if the employee is allowed to access the system via the XTAPI DLL.
Cost center
Assign a cost center to your employee.
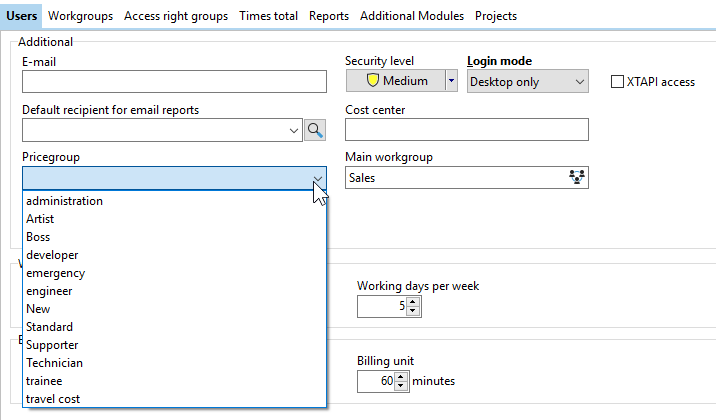
Price group
From the sub menu, select the appropriate price group that you want to assign to the employee.
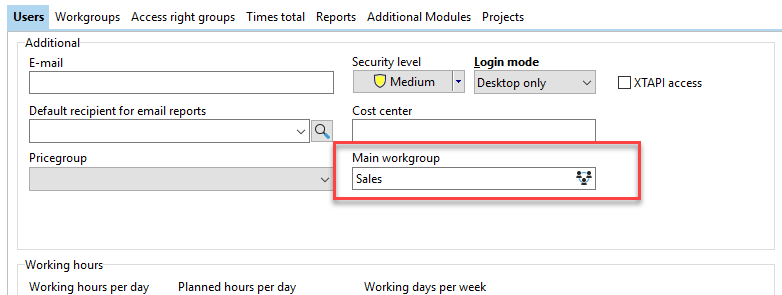
Main work group
If you have activated the workgroups in your system (via the administration program XTAdmin), each user must be assigned to a main workgroup. This is the work group, new projects will be saved, if the user creates one.
Now enter the required information in the "Working Hours" and "Billing" areas.
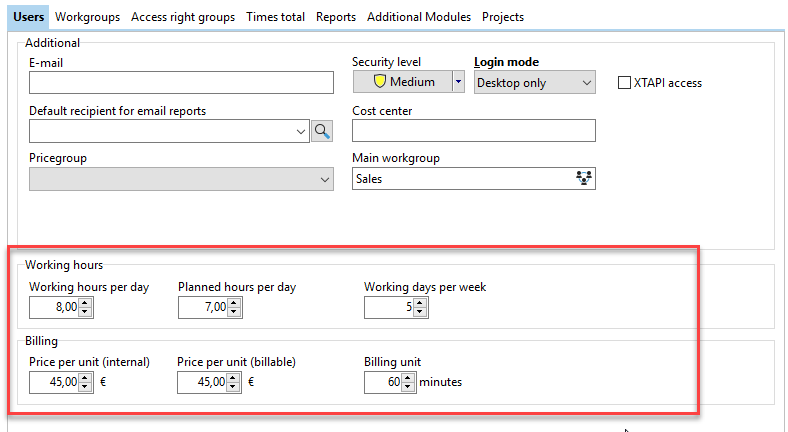
The number of working hours per day refers to the display of total hours worked on the time bar. If you work longer than the number of hours specified here, the total working time on the time bar will appear in red. Likewise, this information is used to display the over or under hours in the report "Coming / Going" of the respective employee.
The planned hours per day is only for your information.
Billing is used to calculate the internal and external costs of projects. With each project, you can define the project hourly rate of this project. However, it is often the case that several employees work on a project, but different hourly rates are charged to the customer. So the engineer is e.g. charged with 90.- € / h and the trainee only with 40.- € / h. To calculate the project on the base of different employee costs, you must include the internal rate of the employee in the project and set a billable hourly rate for each employee. You enter the actual cost for the employee in the company in the Price per unit (internal) field.